
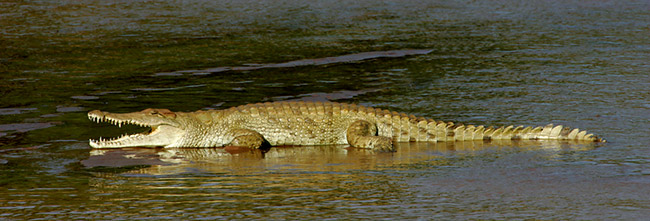
When using flash to photograph birds, the eyes are often rendered quite funky… Red-eye and steel eye (an odd-looking silvery crescent on the eye) were common when using flash with film, but with digital (which is more sensitive to flash than film was), the effects are both wider ranging and even more detrimental to the image. When examining a flashed bird’s eye at high magnification, unnatural highlights and lightened and artificially colored (usually purplish) pupils are often revealed. Most folks simply ignore these problems but the fix takes only minutes...
Here is what you can learn to do with the techniques that you will learn in the Digital basics File:

The image above represents the converted Raw file.
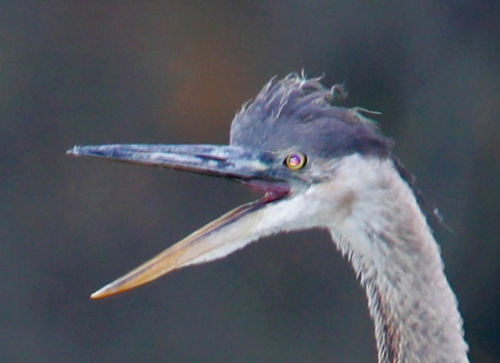
This is a close-up of the face from the image above.
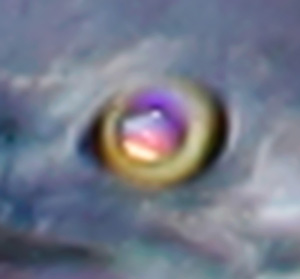
This is a close-up of the eye.
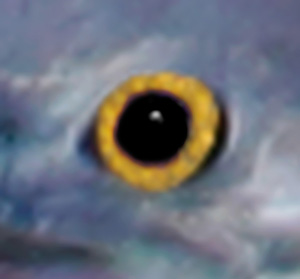
This is a close-up of the eye after a visit from the Digital Eye Doctor. Various techniques were used to restore the eye.
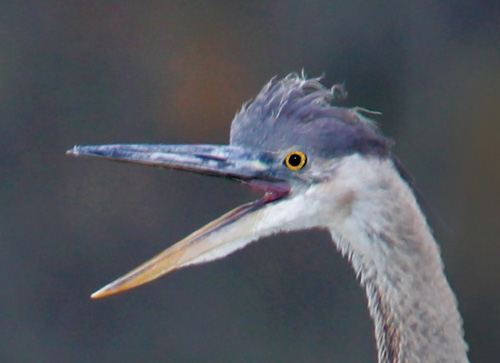
This is a close-up of the head after the eye had been repaired.

And this is the optimized image after Cloning and Levels, Hue Saturation, and Selective Color Adjustments.
.....
The techniques that I use to repair flash-damaged eyes are detailed in the "Digital Eye Doctor" section of the Digital Basics File update. Also included in this section are detailed instructions on selectively sharpening the eye or eyes of a bird.
Of course this is an individual decision, but in my opinion there are several major improvements in CS2. I’ve been fortunate enough to be using CS 2 for the past few months as I worked on my new book (co-authored by Tim Grey), "Photoshop for Nature Photographers; A Workshop in a Book."
New to CS2 is Bridge, which replaces the old File Browser. Bridge is considerably more robust and offers a film strip mode that makes image editing much easier. You can also quickly and easily create a slideshow if you’d like. The slide show in Bridge is vastly improved from the PDF slideshow in CS. In addition you can quickly rate each image with 1 - 5 stars and/or one of 5 color labels. You can then view only the starred or color-coded items as desired. You can also open a second Bridge window to compare images. Depending upon the size of your monitor the preview can be quite large. Unfortunately we can’t yet zoom in to check for critical sharpness. On my 12 inch laptop this can sometimes be a drawback, but on my 23” home monitor, it’s not an issue. Bridge enables you to import and rename your files in one step as you download. And Bridge can run independently of Photoshop. For those who do not have the luxury of using Breezebrowser to edit and manage their images, Bridge will be a godsend.
Another major improvement is Adobe Camera Raw (CR). CR has an intuitive interface and offers sophisticated adjustments that are not possible with many other converters. The advantage of making these adjustments prior to Raw conversion is that they are made using linear data. In practical terms this means that you making adjustments to the data in the raw file without damaging any pixels. With some images, these adjustments can reveal more highlight and shadow detail than is possible later in Photoshop. In addition to the sliders that were in CR in CS, there is a Curves tab that you can use to fine-tune the adjustments you make with the sliders. The exposure control is truly impressive. The ability to remove fringing and lens distortion is impressive.
With CR you can do much of your optimizing before converting the image. And CR allows you to easily batch process as many images as you’d like. You can choose which settings to apply to the batch. You’ll still need to do dust removal, color tweaking, resizing and sharpening in PS. Within Photoshop CS 2 there is a new tool, Spot Healing, which makes dust-spotting much faster. It works well in low detail areas. And there’s a new sharpening tool, Smart Sharpen, that can be quite useful. There are a few other tweaks to PS as well within the filter sections.
Another feature that some photographers, especially those concentrating on landscapes, may appreciate is the ability to create 32-bit High Dynamic Range (HDR) images. To do this you need to make 3-6 different exposures in-camera. Why go through the bother? The resulting 32-bit HDR images feature a vastly extended latitude range, thus revealing incredible detail.
For me, CS2 offers a lot of improvements. It may for you too.
Artie
Note: Arthur Morris has been a Canon contract photographer since 1994 and continues in that role today. Hunt's Photo of Boston, MA is a BIRDS AS ART sponsor, as is Delkin Devices. Do feel free to forward this Bulletin to one or more photographer-friends. Those wishing to subscribe click here: mailto:http://birdsasart.us1.list-manage.com/subscribe?u=94ad23bd96f48a1de2ca612b3&id=bdb4a511a0?subject=subscribe To unsubscribe, click here: mailto:birdsasart@verizon.net?subject=unsubscribe. Back issues of all BAA Bulletins and relevant BAA Notes are archived on the web site at: http://www.birdsasart.com/bn.html