BIRDS AS
ART BULLETIN #275
NOVEMBER 1, 2008
Please
give the images a minute or two to load and do make sure that your security
settings
are
not preventing you from seeing them. (Some folks just need to click on “Show
(or allow) Images” on the frame of the e-mail. If you have any trouble at all
viewing this Bulletin, you can access it in the Bulletin Archives here: http://www.birdsasart.com/bn275.htm
FALL COLOR
REPORT
NIKON
200-400 VR FOR
SALE
A FREE
DIGITAL BASICS EXCERPT: GETTING RID OF THAT BRANCH!
FX-6
BETTER BEAMER FOR NIKON SB 900 FLASH NOW AVAILABLE
THANKSGIVING DAY LUNCH AT BOSQUE
DELKIN
CARD READERS/A SUMMARY
IPT
UPDATES
Contact us
by phone at 863-692-0906 (Eastern Time Zone) or by e-mail at
birdsasart@att.net
or
birdsasart@verizon.net.
The att
e-mail
address is
best from overseas.
We gladly accept credit card orders by phone from
8am
till
7pm
Eastern Time (8
am
till
3pm
Fridays
and some
weekends).
You can
use the PayPal links on the web site to order anything. Just type in the item(s)
and the amount. If using your own PayPal account, please send to either of the
e-mail addresses above.
Note:
maximize this e-mail for best formatting.
Important Request:
if responding to this e-mail,
please take the time to delete all images and all irrelevant text.
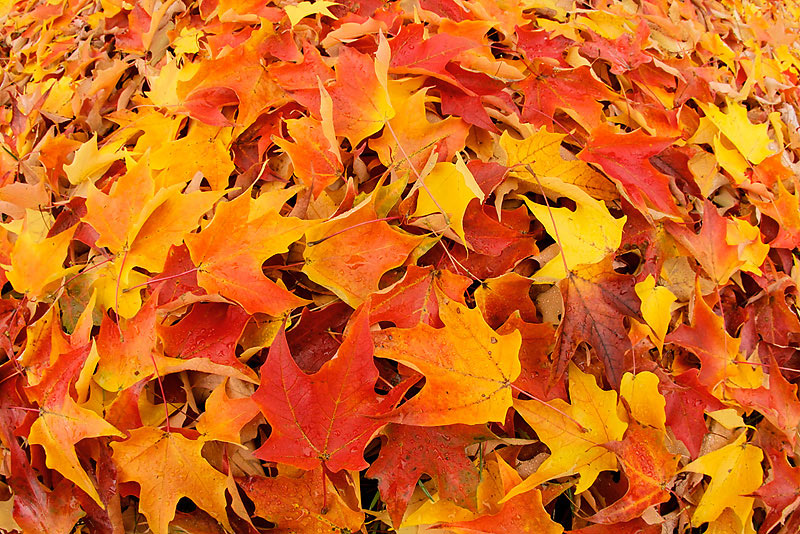
Maple leaves on library
lawn,
Brunswick,
Maine
Image copyright 2008:
Arthur Morris/BIRDS AS ART
Canon 15mm Fish-eye lens on
the fantastic Giotto’s Tiny Ballhead (http://www.birdsasart.com/giottos.htm)
with the Wimberley P-5 camera body plate (http://www.birdsasart.com/accs.html#WIMBERLY_PLATES)
and the Canon EOS-1D MIII. ISO 400. Evaluative metering +1 1/3 stops: 1/10
sec. at f/16. Mirror lock and 2 second self-timer.
We were stopped cold by
this huge pile of leaves while exploring southern
Maine
on the Tuesday following the seminar.
No matter how much I reduced the red Saturation the leaves look like enamel
paint. I experimented with adding lots of Cyan in Selective Color and found
that with this image, adding an amazing 60 points of Cyan did the trick. Go
figure. I now have to go back and redo about 25 Caspian Tern keepers…
FALL
COLOR REPORT
After the Portland Seminar
we spent several days exploring for fall color in southern New Hampshire (and in
southern Maine); we had a big head start
as Monsieur Chris Dodds had scouted New Hampshire’s White Mountains when he
drove from his home in Quebec to the seminar
on Friday. I could not tell you exactly where we were on Monday and Wednesday
other than that we traversed the famed
Kancamagus
Highway
and Routes 16/302 north out of
North Conway.
I was really stoked as we hit the peak of color just right. Chris felt however
that the trees had lost lots of leaves between Friday when he first drove
through the
area
and Monday when we returned. At this point I am planning on re-visiting next
year
and adding some
Vermont
locations.
Vermont
will be my 50ieth state.
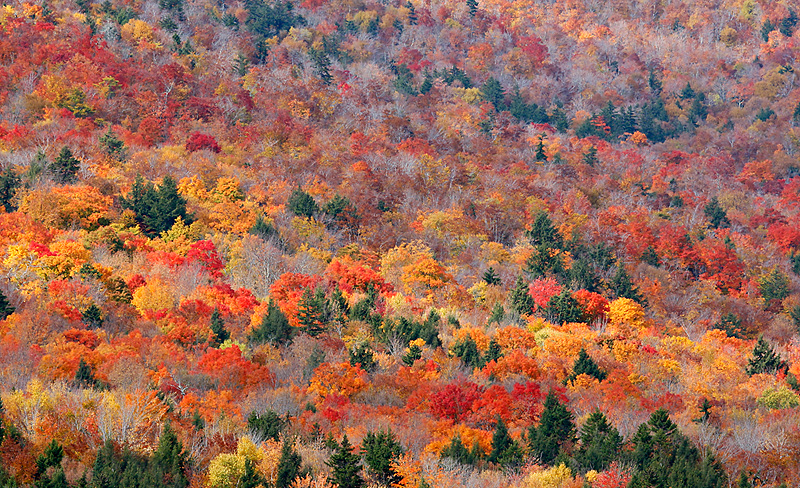
Fall color, White Mountain
National Forest, NH
Image copyright 2008:
Arthur Morris/BIRDS AS ART
Canon 100-400mm IS L lens at
275mm with the Canon EOS-1D MIII. ISO 400. Evaluative metering +2/3 stop:
1/80 sec. at f/18 in Manual mode. Mongoose M3.5 on Gitzo CF 3530 LS tripod.
The smattering of
evergreens in the
White Mountains
adds to an already amazing
array
of colors.
NIKON
200-400 VR FOR
SALE
Used Zoom-Nikkor 200-400mm
f/4G AF-S VR for sale. Excellent condition. Perfect glass. This is considered
by many to be the finest telephoto or zoom lens ever. The image quality attained
with this lens is absolutely superb.
AF operation is very quick and works great with 1.4X and 1.7 X TC. Images are
vividly saturated, have high contrast, and tremendous detail. Sharpness is
exquisite even wide open with super bokeh. Lots of extras including:
4th Generation Design Low Profile QR Lens Foot, Lens Coat, the Lens Hood:
HK-30, the CL-L2 Soft Case and the original Nikon box, shipping box, and all
documents as shipped when new.
Minimum Shooting Distance:
6.4 ft. Max. Reproduction Ratio: 1:3.7. Dimensions: Approx. 4.9 x 14.1
inches. Weight: Approx. 7.2 lbs
New $5299. $4900.00 FedEx
shipping incl to cont
US.
These lenses can be
extremely difficult to find new in most stores, are out of stock at the best
wholesale camera shops, and are selling used for $4950 in less than excellent
condition with no extras.
To contact the seller,
please e-mail Jim at staffbaa@att.net with
"Nikon 200-400 Seller Contact Info" cut and pasted into the subject line.
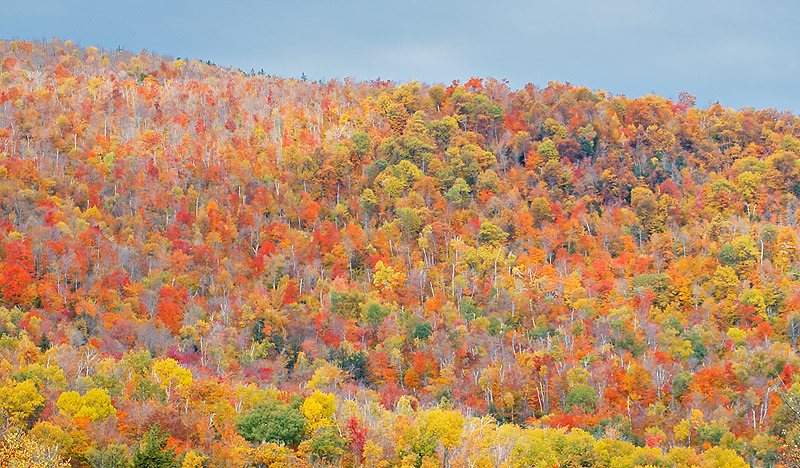
Fall color, White Mountain
National Forest, NH
Image copyright 2008:
Arthur Morris/BIRDS AS ART
Canon 100-400mm IS L lens at
180mm with the Canon EOS-1D MIII. ISO 400. Evaluative metering +2/3 stop: 1/80
sec. at f/11 in Manual mode. Mongoose M3.5 on Gitzo CF 3530 LS tripod.
This is a two-frame
stitched pano. By Wednesday there were lots more leaves on the ground but the bare
trees added interest; they looked like gray skeletons… The 100-400 is a great
fall color lens and it works perfectly well with the Mongoose M3.5 that I use
with my 500 f/4 IS lens to reduce the weight that I am carrying.
A
FREE DIGITAL BASICS EXCERPT: GETTING RID OF THAT BRANCH!
A while back I answered a
question about eliminating distracting background elements and added it to the
January 2008 Digital Basics Update. Since that time while teaching IPTs and
Weekend Seminars I used the terms "Divide and Conquer" and "Protect and Defend"
so often that I assumed that those two terms were specifically mentioned in
Digital Basics. Recently I learned that they were not. Here, as an early
holiday gift, is a free excerpt from the re-written section. The text below
will be added to the next update that I should have done by late December.
Enjoy. If I am giving this
away for free, just imagine how much you would learn by purchasing a complete
copy of Digital Basics File (a PDF file sent by e-mail). To learn more, click
here:
http://www.birdsasart.com/digitalbasics.htm or send a Paypal for $20
to birdsasart@att.net.
GETTING RID OF THAT
BRANCH!
First off, here is some generic advice that can help you eliminate distracting
branches:
Divide and
Conquer
Let’s say that
you have a
long
branch
in the background that needs to be removed. Best would be to use a Quick Mask,
but in many instances there is simply not enough matching background with which
to cover the distracting branch. The Patch Tool is greatly preferred to the
Clone Stamp as the Patch Tool blends texture while the Clone Stamp copies
texture-less color. It is often impossible to patch a
long
branch
in one fell swoop, and if you try to work with small sections of the branch you
will encounter terrible smudging. What to do? Divide and conquer. By cutting
the offending branch into two or more pieces you can create manageable
sections. Loggers cut a big tree trunk into sections that can be much more
easily handled than the whole trunk itself. To cut up your distracting branch,
use the Clone Stamp at 80% opacity. You will have to Alt-Click several times to
finish the cut. (If the tonality on one side of the branch is of a slightly
different tonality or color than the other, be sure to work from both sides Once
you have cut the branch into manageable sections, you can use the Patch Tool to
eliminate the remaining sections. You may need to use the Protect and Defend
techniques described below to deal with the ends of the branch (depending on
where they end and what they intersect with).
Now here is an
advanced tip: If the spot where you cut the branch with the Clone Stamp looks
at all lumpy or funky (i.e., if it shows ugly Clone Stamp marks),
simply encircle the offending section with the Patch Tool and drag it to a
smooth, similarly toned area.
And here is an e-mail exchange that I had recently with BAA Bulletin subscriber
Art Hoover:
AH: Hi Art, I purchased Digital
basics some months ago. I have found it very informative and well organized.
In the introduction, there is a photo of the spoonbill (see the before and
after photos here:
http://www.birdsasart.com/digitalbasics.htm)
used as an example of what can be done with proper technique. Of
particular interest to me is the removal of the distracting branch. I have many
photos taken from the backyard blind that suffer from distracting foreground or
background branches. In the text there is no definitive process as
to how to deal with their
removal. Am I missing something? A step by step instructional demo on
this technique is what I need to save my otherwise great images. You are the
GURU ! Can you help, or point me in a direction to master this seemingly simple
process? Art
AM: All of the skills that
you need to remove a branch were in the last few versions
of DB but with the Patch Tool (covered in the most recent update) doing so is
tons easier. And you are correct; I did not outline the steps.
Here is how I do it:
If the branch in
question passes in front of the bird’s body, begin here.
(You will--of course--be working on the background copy, or on an empty
layer.)
1-If more than a
bit of the branch is set against the background, use the divide and conquer
technique described above to remove that part of
the branch (in sections, with the Patch Tool). Do leave a short stub sticking
out from the bird’s body.
2-Once this is
done, use the Patch Tool to make the last section of branch disappear.
(On the Tool of Settings Bar that lies below the menu items, make sure that
Source—not Destination—is checked.) Draw a loose shape
around the remaining section of branch, the
section that overlaps the bird. Then click-drag the selected
area either to one side or the other or up or
down so that the edge of the bird lines up perfectly. Let go of the cursor; the
results
are usually magical!
3-If the part
of the branch atop the bird’s plumage covers all or a good part
of the bird, you will need to divide and conquer before you use the Patch Tool
(again to prevent smudging). Once the branch is divided into sections, simply
encircle one section at a time and click-drag it to a similar
area of plumage. Before you release the cursor
move the section
around a bit to try and match feather detail.
Once you
are satisfied, simply release the cursor.
If the branch in
question passes behind the bird’s body,
follow these steps:
1-First divide the branch into smaller, manageable sections as described above
in Divide and Conquer.
2-Next, use the Patch Tool to get rid of the sections that
are set against the background.
3-To
remove the last section of branch, the section that intersects and then disappears
behind the bird you can try the Patch Tool as described above, or use the
Protect and Defend technique:
Protect
and Defend: The most difficult part
of the process is getting rid of a branch where it intersects the bird’s body
(or with anything else that is clearly
defined such as the main perch branch). To do this cleanly, use the magnetic
lasso if possible; there is often enough contrast to do this. If not, use the
Polygonal Lasso Tool and click often; if you keep clicking as you go, this will
give you a good selection even though each section is actually a straight line.
(Note: If you
are
working with a downy chick or with a bird that has lots of tiny feathers
sticking up it will be difficult or impossible to make a good selection.)
Begin along the edge of the bird’s body well to one side of the spot where the
branch intersects the bird and continue well past that spot. Now you need to
complete the selection by getting back to the starting
point. Do so by dragging the cursor onto the bird’s body a
bit (about an inch or two on your monitor) and then circling back until you get
to the spot where you started.
Release the cursor and the marching
ants will outline your selection. You will have effectively selected a roughly
rectangular
chunk of the bird. Then click on Select/Inverse and feather the selection two
pixels. Now use the Clone Stamp and careful
cloning techniques to remove the branch. It is often best to work with the Clone
Tool set to 75-80% opacity and to click several times. The bird’s body
will be “protected” from the clone stamp by the inverse selection so you
can clone over the border between the bird’s body and the background with
impunity. The Clone Stamp cannot affect the
area
that you have selected and protected. Click on Select/Deselect (or hit Control
D, the keyboard
shortcut). Finis.
It sounds
complicated but is not too tough to do once you get used to it. Do it a few
times and you will own it. Best,
artie
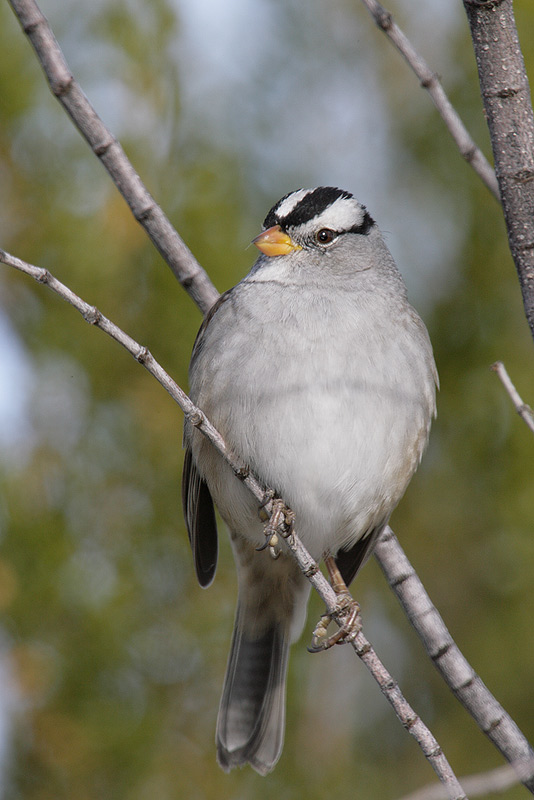
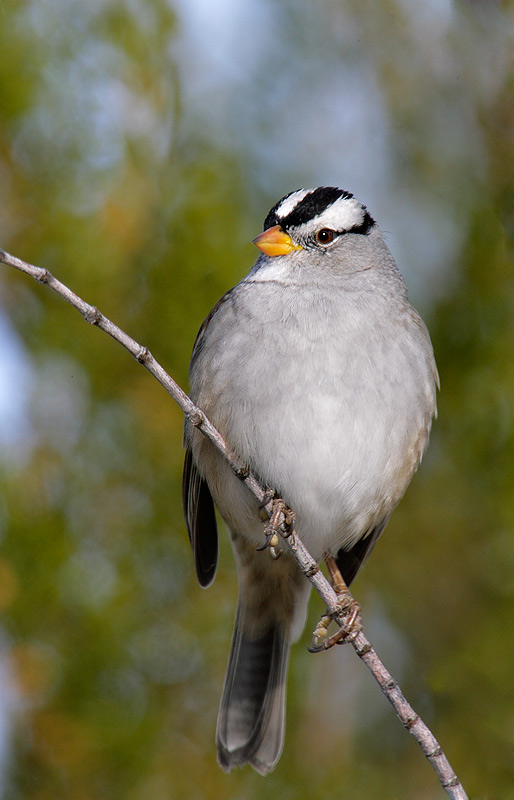
White-crowned Sparrow,
Bosque Del Apache NWR,
San Antonio,
NM
Image copyright 2008:
Arthur Morris/BIRDS AS ART
Canon 600mm f/4 L IS lens with
the 2X II TC and the EOS -1Dn on a BLUBB from the vehicle. ISO 400. Evaluative
metering +2/3 stop: 1/160 sec. at f/16.
To create the optimized
image below from the original image above I followed the BAA Digital Workflow,
used the “Divide and Conquer” and the “Protect and Defend Techniques” described
above, used both Digital Eye Doctor and selective sharpening
via Quick Masking techniques, and the Patch Tool as outlined in Digital Basics:
http://www.birdsasart.com/digitalbasics.htm. Thanks again to Scott
Bourne for opening my eyes to the Patch Tool in Bosque several years back at
K-Bob’s!
FX-6
BETTER BEAMER FOR NIKON SB 900 FLASH NOW AVAILABLE
Thanks to Walt Anderson at
Visual Echoes for custom designing the new FX-6 Better Beamer expressly for the
Nikon SB 900 flash units and getting them to us so quickly.
Better Beamers
are
$40.00 plus $4 shipping to US addresses. (Florida
residents please add 7% sales tax = $46.80). Shipping to
Canada
is $6.00 ($46.00 total) and for overseas orders the shipping is $8.00 ($48.00
total). Call (863-692-0906) with a credit card
in hand, send us a Paypal, or send a check made out to “Arthur Morris.”
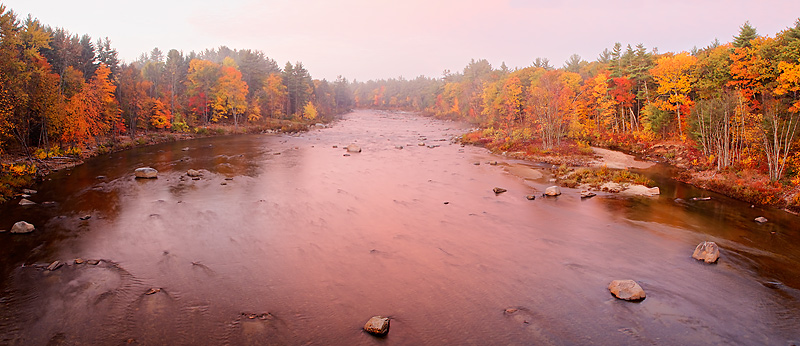
River and pre-dawn fall
color, North Conway, NH
Image copyright 2008:
Arthur Morris/BIRDS AS ART
This 2-frame pano was created
with the Canon 24-105mm IS L lens (at 24mm) on the fantastic Giotto’s Tiny
Ballhead (http://www.birdsasart.com/giottos.htm)
with the Wimberley P-5 camera body plate (http://www.birdsasart.com/accs.html#WIMBERLY_PLATES)
and the Canon EOS-1D MIII. ISO 400. Evaluative metering +1 2/3 stops set
manually: 1.6 sec. at f/13. Mirror lock and 2 second self-timer.
I made a quick
u-turn when I saw this out of my window at 60mph… Without the Giotto’s tiny
ballhead in my vest, I would have been dead…
THANKSGIVING LUNCH AT BOSQUE
On Thanksgiving Day,
Thursday, November 27, 2008,
I will once again be hosting a lunch for visiting photographers and birders. We
can accommodate as many as 50 folks; as I was late announcing this there is
still lots of room. (Only ten right now.) For the fourth consecutive year,
the lunch will be held at the
Luna
Mansion,
an historic building in Las Lunas,
New Mexico
that is about an hour up the pike from Socorro on I-25. And oh, the food is
superb. You can learn
more about
Luna
Mansion
here: http://thelunamansion.com/.
The cost of the complete lunch will be $35, the same as last year. This
will include several courses including your main course, a dessert, a
non-alcoholic beverage, and the tip. If you have wine or a cocktail with your
meal you will need to pick up the tab for that. All
reservations must be paid for in advance by check, Paypal, or credit card.
Please make your reservations ASAP. Checks (made out to “Arthur Morris”) should
be sent to us at
PO Box
7245,
Indian
Lake
Estates, FL 33855.
If you will be joining us,
please plan on being at the
Luna
Mansion
no later than
11am
sharp.
I do hope that you can make it.
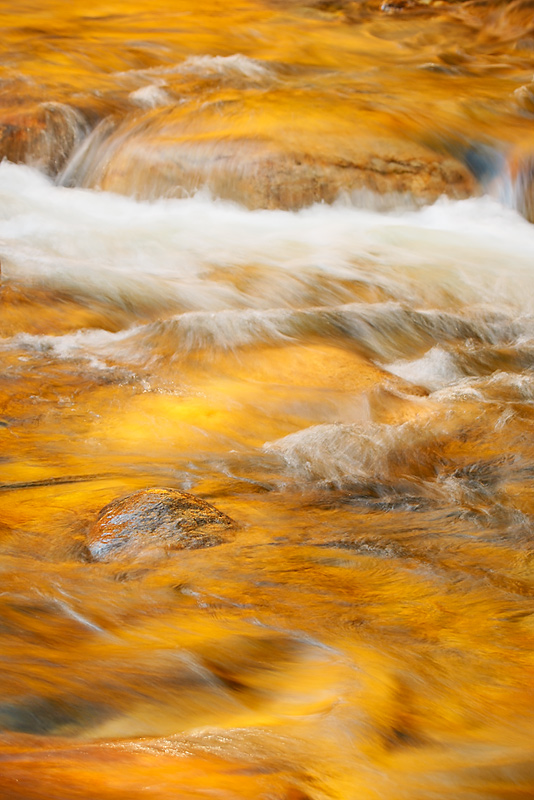
Fall color reflections in
stream, White Mountain National Forest, NH
Image copyright 2008:
Arthur Morris/BIRDS AS ART
Canon 100-400mm IS L lens at
190mm with the Canon EOS-1D MIII. ISO 200. Evaluative metering +1 stop: 1/4
sec. at f/9. Mirror lock and 2 second self-timer. Mongoose M3.5 on Gitzo CF
3530 LS tripod.
Images that I made at 1 and
2 second exposures looked great on the back of the camera but not on the laptop
so I am glad that I experimented with some (relatively) faster shutter speeds…
You gotta love digital.
DELKIN
CARD READERS/A SUMMARY
I have been using various
Delkin Card
Bus Adapters (Readers) ever since I learned
that they were way, way faster than pretty much everything else
around.
At present I use the Express Card
54 UDMA Compact Flash Adapter (Reader) with my HP laptop. (Transfer speed of
over 30 mbs.) I suggest that once you place it in the slot that you leave it
there as I do. When I remove a card
from the reader I simply hold the reader in with the tip of my left thumb and
pull the card
out with my right hand. Keeping the reader in the machine all the time allows me
to insert a card
instantly when I am ready to download without having to worry about putting the
card
into the slot each time, prevents loss—I always know where it is, and lastly and
most importantly, prevents damage to the reader. I did the same thing when I
used both the Express Card
34 and the Card
Bus 32 readers. (See more on those below.)
The Express Card
34 is for slightly older laptops that have 34-pin Express Card
slots. (Transfer speed of over 32 mbs.) The Card
Bus 32 is for older computers with PCMCIA slots. (Transfer speed of over 45 mbs.)
If you use need either of these two it would be best to order at least two (I
always travel with a always travel with a back-up card
reader) as it is my understanding that we
are
the only folks
around
with these out-of-production items in stock.
NEW:
I ran across someone who was downloading their images directly from their Nikon
camera because their Mac “did not have any slots.” Yikes! It was taking them
more than 45 minutes to download a single 8gb card.
I suggested a Delkin Fire Wire 400/800 UDMA Compact Flash Reader and bingo,
downloading times were reduced almost 90%. (Transfer speed of over 45 mbs with
UDMA cards.
Mac or PC. Fire Wire 400 & 800 compatible.) As the transfer speeds for this
reader
are
50% higher than for the Express Card
54 that I am currently using I plan on bringing one of the Fire Wire 400/800
UDMA Compact Flash Readers to
San Diego
and Bosque and will report back in early
December.
Each of the above adapters is
available from BAA for $59.99 plus $3.00 shipping = $62.99.
Florida
residents please add 7% sales tax for a total of $67.19. To
Canada
please add $5 and for overseas orders, the shipping will be $9. Paypal, credit card
orders by phone (863-692-0906), and checks made out to “Arthur Morris”
are
all wonderful. I will be here most of this weekend
7am till
9pm
to take your order.
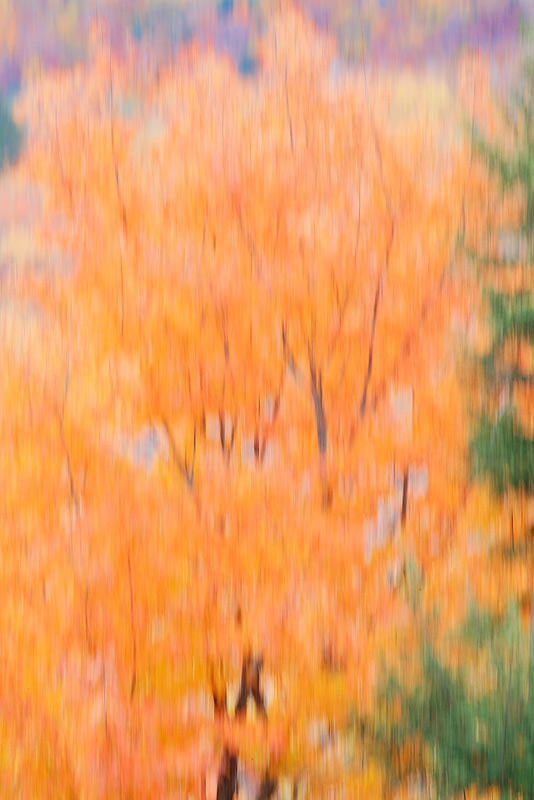
Fall color, White Mountain
National Forest, NH
Image copyright 2008:
Arthur Morris/BIRDS AS ART
Canon 100-400mm IS L lens at
400mm with the Canon EOS-1D MIII. ISO 400. Evaluative metering +1 stop: 1/8
sec. at f/20 in TV Mode. Mongoose M3.5 on Gitzo CF 3530 LS tripod.
The combination of the wind
and a slow shutter speed yielded the blur. For absolute control of shutter
speed it is best (as noted in ABP II:
http://www.birdsasart.com/ABPII.htm ) to work in Shutter Priority.
IPT
UPDATES
Due to four recent Bosque
cancellations please note that we now have two openings on each 2008 IPT.
Bosque IPT #1:
NOV 22-25, 2008.
Slide program on the evening of NOV 21. 4-DAY:
$1799 Limit: 10/Openings: 2.
Co-leader: Robert O’Toole.
Bosque IPT #2: NOV 29-DEC 2, 2008.
Slide program on the evening of NOV 28.
4-DAY: $1799 Limit: 10/Openings:
2. Co-leader: Robert O’Toole.
SW FLA
POST X-MAS IPT: DEC 27-29 or 30, 2008.
Slide program on the evening of DEC 26. 4-DAY: $1799
(3-DAY OPTION:
$1349)
Limit: 10/Openings: 5.
Co-leaders:
Robert O’Toole and Alfred &
Fabiola Forns.
This IPT is shaping up to be a practically private affair. If you can fit it
in your holiday schedule, do consider joining us. There is some truly great
photography available in
Florida
while winter is setting in in most of the country...
SW FLA
PRESIDENT'S DAY IPT:
FEB 13-17,
2009.
Slide program on the evening of
FEB 12.
5-DAY: $2249
Limit: 10/Openings: 2. Co-leaders:
Robert O’Toole and
Scott Bourne.
POST-NANPA 2
½ DAY BOSQUE IPT.
FEB 22-24, 2009.
2 1/2-DAY: $799. Limit: 15/Openings: 10.
Best combined with my Sunday morning NANPA Summit program: "Photographing
Bosque Del Apache: In-the-Field Strategies and Post Processing Techniques"
Sunday FEB 22, 2009.
(Registration for the Sunday program only through NANPA.) Photograph Sunday
afternoon till sunset and all day Monday and Tuesday.
Bear
Boat #1:
June 4-10, 2009.
Openings: 4. (It is advised
that you be in
Anchorage
on the afternoon of June 2nd to be assured of not missing the boat!). This trip
will feature an afternoon (and possibly more) of otter photography (weather
permitting), Bald Eagles and likely chicks in the nest, and lots and lots of
coastal Brown Bears
clamming and eating luscious green grass.
Bear
Boat #2:
Sept 4-10,
2009.
Openings:
3. (It is advised that you be in
Anchorage on the afternoon of the September 2nd to be assured of not missing the
boat!). This one is the bears
catching salmon trip. In addition, Glaucous-winged and Mew Gulls eating roe
are
a certainty, and dark
phase Northern Fulmars
and Black-legged Kittiwakes (including the gorgeous immatures), Harbor
Seals, and Stellar’s
Sea Lions
are
likely. Did I mention bears
catching salmon? And more bears
catching salmon?
The rates for the 2009
trips have increased due to increased fuel costs. Bear
Boat #1 (cheaper by $250 as we use the float plane only once): $6749. Bear
Boat #2: $6999.
Two slots
are
filled on each trip.
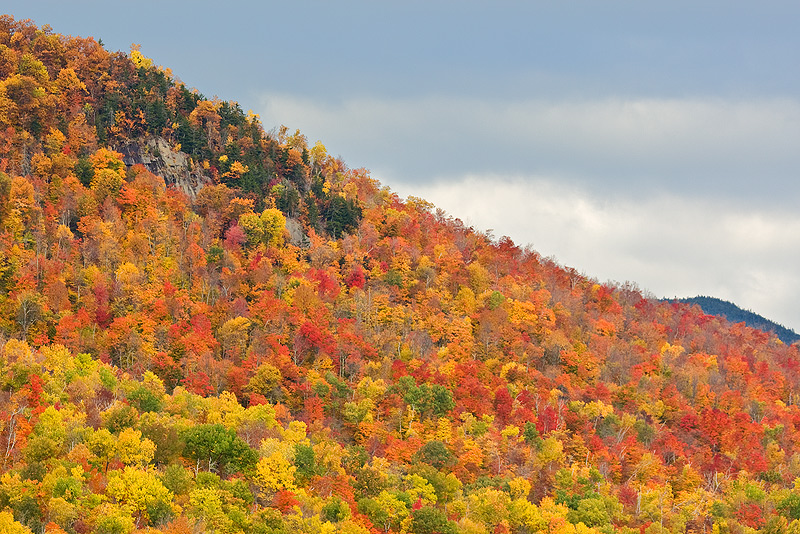
Fall color with rock face,
White Mountain National Forest, NH
Image copyright 2008:
Arthur Morris/BIRDS AS ART
Canon 100-400mm IS L lens at
190mm with the Canon EOS-1D MIII. ISO 400. Evaluative metering +2/3 stop:
1/160 sec. at f/9 in Manual mode. Mongoose M3.5 on Gitzo CF 3530 LS tripod.
It’s no wonder that I fell
in love with fall color after being out of NY since 1994… This image was made
from a pull-off on 16/302 named Four Irons. It was our favorite spot.
Best and love
and great picture- making to all,
artie
Note: Arthur Morris has been a
Canon contract photographer since 1996 and
continues in that role today. Hunt's Photo of Boston, MA is a BAA sponsor as is
Delkin Devices. Back issues of all BAA Bulletins can be found in the Bulletin
Archives which
may be accessed from
the home page at
www.birdsasart.com. To unsubscribe click here:
unsubscribe.


